

Solar Power Knowledge
How to Choose & Install RV Solar Panels
 gaotu
gaotu1. How to Pick the Right Power Size for Your RV Solar Panel
How to Choose & Install RV Solar Panels: Many RV owners run into two big headaches when prepping their off-grid power system. Endless solar panel wattage options make sizing confusing, and most DIY fans don’t know the right installation and wiring process. This beginner-friendly guide walks you through RV solar power sizing and full no-drill mounting steps, ideal for factory RVs and self-converted camper vans.
The two key factors for choosing RV solar panel power are your available roof space and daily camping power usage. We’ll use a typical RV as a real-world example for simple, accurate sizing reference.
A standard RV has a total roof area of around 12 square meters. However, roof AC units, skylights, satellite antennas, and roof racks take up plenty of space. After clearing all obstructed areas, you’ll get roughly 5 square meters of usable, unshaded roof space — the ideal spot for solar panel setup.
For this 5㎡ space, you can fit 6 solar panels with 300W to 400W power output. This solar setup fully supports all basic RV power needs, including interior lighting, phone charging, ceiling fans, and small kitchen appliances. It lets you boondock off-grid easily and ditch shore power for daily camping and short road trips.
2. RV Roof Solar Panel Installation (Most Efficient Main Method)
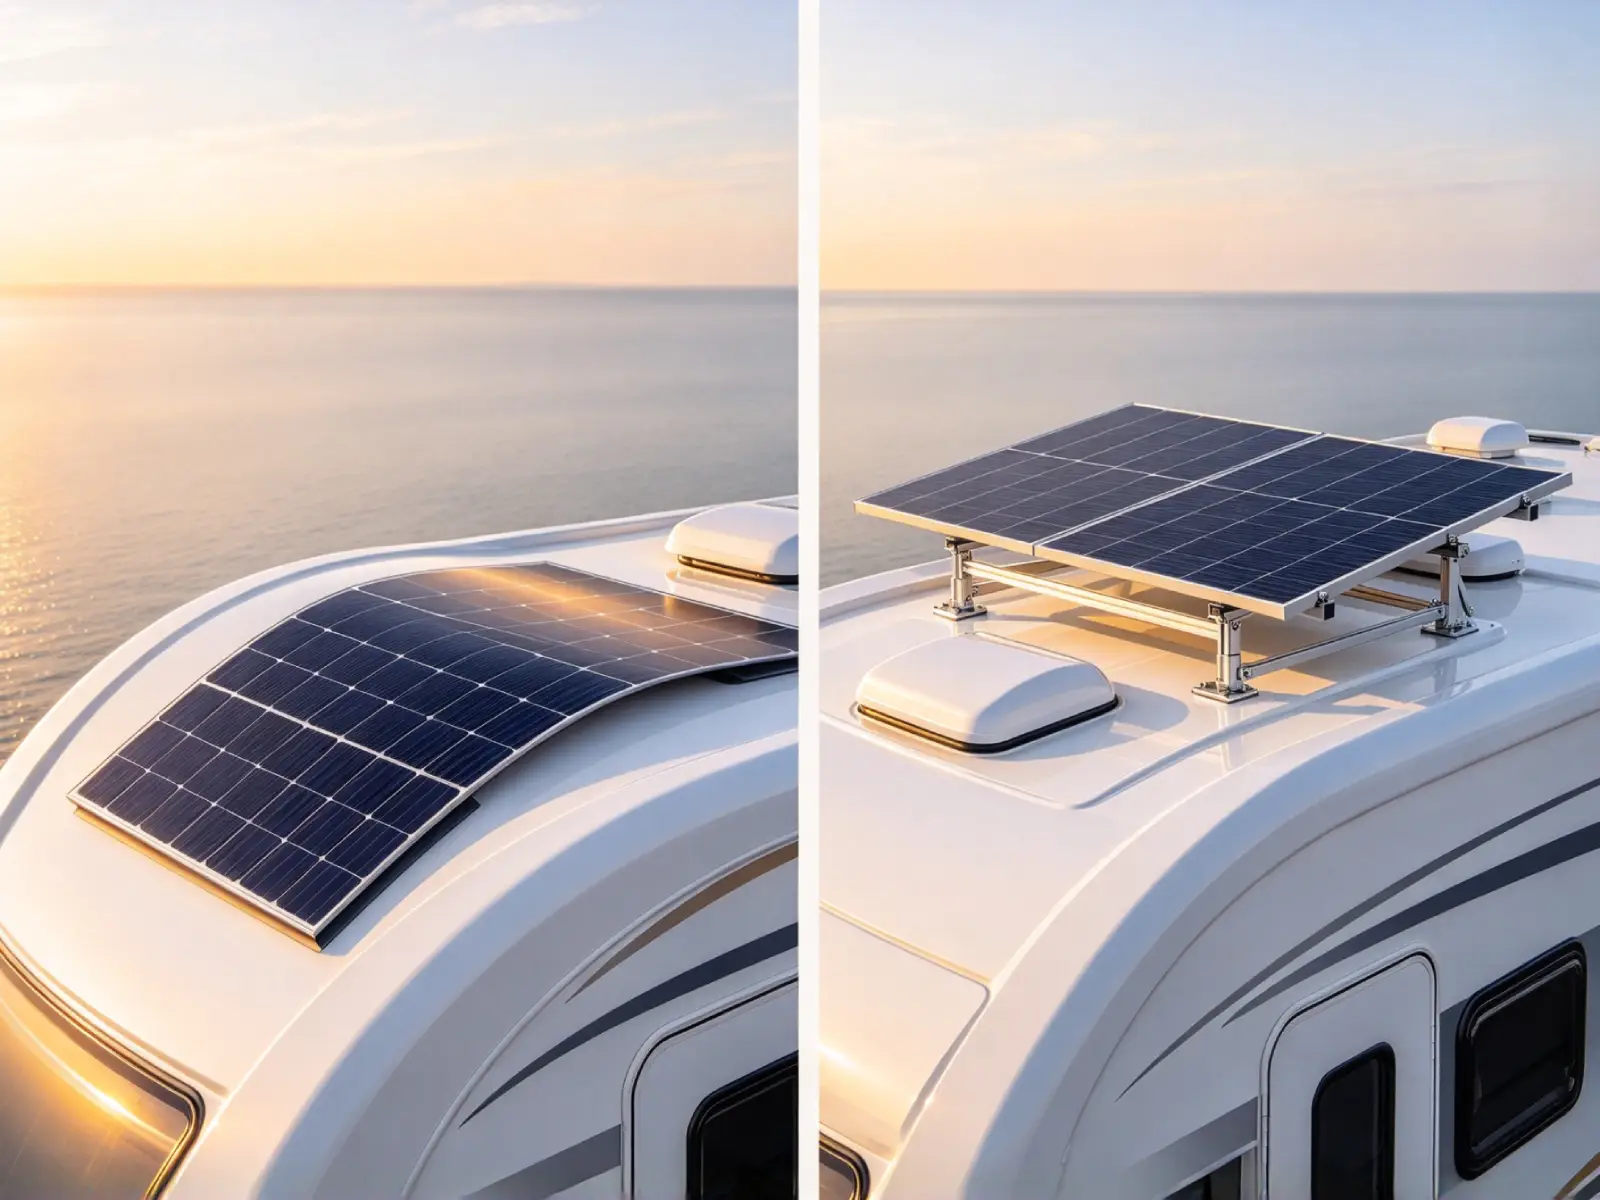
Roof mounting is the top choice for RV solar panels. It gets the most sunlight with zero shading, delivers the best power generation efficiency, and uses a completely no-drill design to protect your RV body.
Step 1: Mark and Clean Your Installation Spot
Check your RV roof carefully and pick a flat, fully sunlit area with no obstructions. Stay clear of roof ACs, skylights, antennas, and roof racks. Once you confirm the mounting position, wipe the roof surface thoroughly to remove dust, oil stains, and water residue. A dry, clean surface ensures strong adhesion and prevents the panels from falling off over time.
Step 2: Secure Panels with Adhesive & Edge Sealing
First, apply high-temperature resistant, heavy-duty 3M double-sided foam tape evenly across the back of the solar panel (cover edges and center for balanced support). Align the panel with your marked roof spot, press it down firmly, and hold for 3 to 5 minutes to ensure a tight, bubble-free fit.
After the panel is fully attached, seal all four edges with professional roof tape. This extra step reinforces the installation, prevents glue failure from long-term sun and rain exposure, and adds waterproof, dustproof, and anti-corrosion protection to extend your panel’s lifespan.
Step 3: Run Wires Through Hidden Gap Routing
No roof drilling is required for wiring. Simply run the solar cables into the RV through factory reserved gaps, such as roof sealant gaps, skylight seams, or roof rack base gaps. Keep cables away from sharp edges to avoid wire wear and damage, and keep the routing hidden for a clean factory-style look.
Important: Never run wires through engine bay or door gaps. These areas expose cables to high heat or squeezing pressure, which can cause wire damage and potential safety hazards.
Step 4: Wire Properly to RV Battery
Once wires are routed inside the RV, choose one of the four safe wiring methods based on your RV’s electrical setup. Always use a solar charge controller if your system has one.
1. Recommended (With Charge Controller): Connect the solar panel’s positive and negative wires to the corresponding PV terminals on the controller first. Then run wires from the controller’s battery output ports to your RV battery’s positive and negative terminals. The controller stabilizes voltage and prevents overcharging to protect your battery.
2. Direct Battery Connection: Neatly route and connect the solar cables straight to your dedicated RV battery in the engine bay for stable power transmission with minimal energy loss.
3. Cigarette Lighter Port: This is the easiest temporary setup. Note that most factory RV cigarette lighter ports are key-controlled — they cut power when you remove the key, so they cannot charge the battery continuously.
4. Stock Circuit Parallel Connection: You can also tap into existing 12V circuits (such as interior light wires) that connect directly to the RV battery for auxiliary charging.
3. RV Body Side Solar Panel Installation (Auxiliary Setup)
If your RV roof is too crowded for full solar setup, side mounting is a great auxiliary solution to boost your off-grid power capacity.
Step 1: Select and Clean the Side Mount Area
Choose a flat, sun-exposed, unobstructed spot on your RV body. The most common positions are below the windshield and open flat areas on the side body. Clean the mounting surface completely to remove dirt and debris for maximum adhesive strength.
Step 2: Attach and Seal the Solar Panel
Follow the same method as roof installation: apply heavy-duty 3M double-sided foam tape to the panel back, align and press firmly onto the RV body, then seal all four edges with roof tape for waterproofing and reinforcement.
Step 3: Route Side Wires Into the Cabin
Run cables into the RV through factory body seal gaps and trim seams. Keep wiring tidy and hidden to prevent external abrasion and extend cable service life.
Step 4: Connect to RV Battery
The battery wiring rules are exactly the same as roof-mounted panels. Always use a solar charge controller whenever possible to ensure safe and stable power supply.
4. Critical RV Solar Panel Installation Tips
1. Always install panels in fully sunlit, unshaded areas. Partial shading drastically reduces power output and may cause local overheating damage to solar cells.
2. Stick to the no-drill installation method. Drilling holes in your RV body ruins waterproofing and leads to leaks and rust issues.
3. Double-check positive and negative polarities during wiring (never reverse them). Never bypass the charge controller — skipping it will cause battery overcharging and permanent damage.
4. Route all cables away from high-heat components and sharp edges. Inspect edge seals and wire conditions regularly to keep your solar system in top shape.
Related Posts
Which type of solar panel is best for home use?
Installing home solar panels is one of the most practical ways to cut electricity bills…
Your Commercial Roof Condition Is the Hidden Cost Nobody Warns You About
You’ve finally decided to put solar on your warehouse. You spent months comparing module…

Gaotu Solar Motorized Awning Wholesale | High Margin Shade Solutions for Awning Distributors
1. Pain Points of Traditional Awning Business Every awning wholesaler knows the struggles: generic products…
Leave a Reply