

Solar Power Knowledge
How to Install Solar Panels on a Motorhome: A Step-by-Step Guide
 gaotu
gaotuIf you’ve ever lain awake in bed listening to the endless drone of a noisy generator, or spent your trip stressing out over every single light bulb because you’re terrified of draining your house batteries, you know exactly how paralyzing power anxiety can be.
Going off-grid—or boondocking—is the ultimate way to experience the open road. But to truly cut the cord from expensive campsites, you need a reliable solar setup. For a lot of rig owners, though, looking at a mess of wires, confusing specs, and the terrifying prospect of drilling holes into their roof makes them want to throw in the towel before they even start.
Don’t worry. This guide skips the confusing textbooks. We’re looking at this entirely from a practical, real-world perspective. Packed with solid numbers and clear steps, this guide will walk you through building your own DIY motorhome solar setup with total confidence.
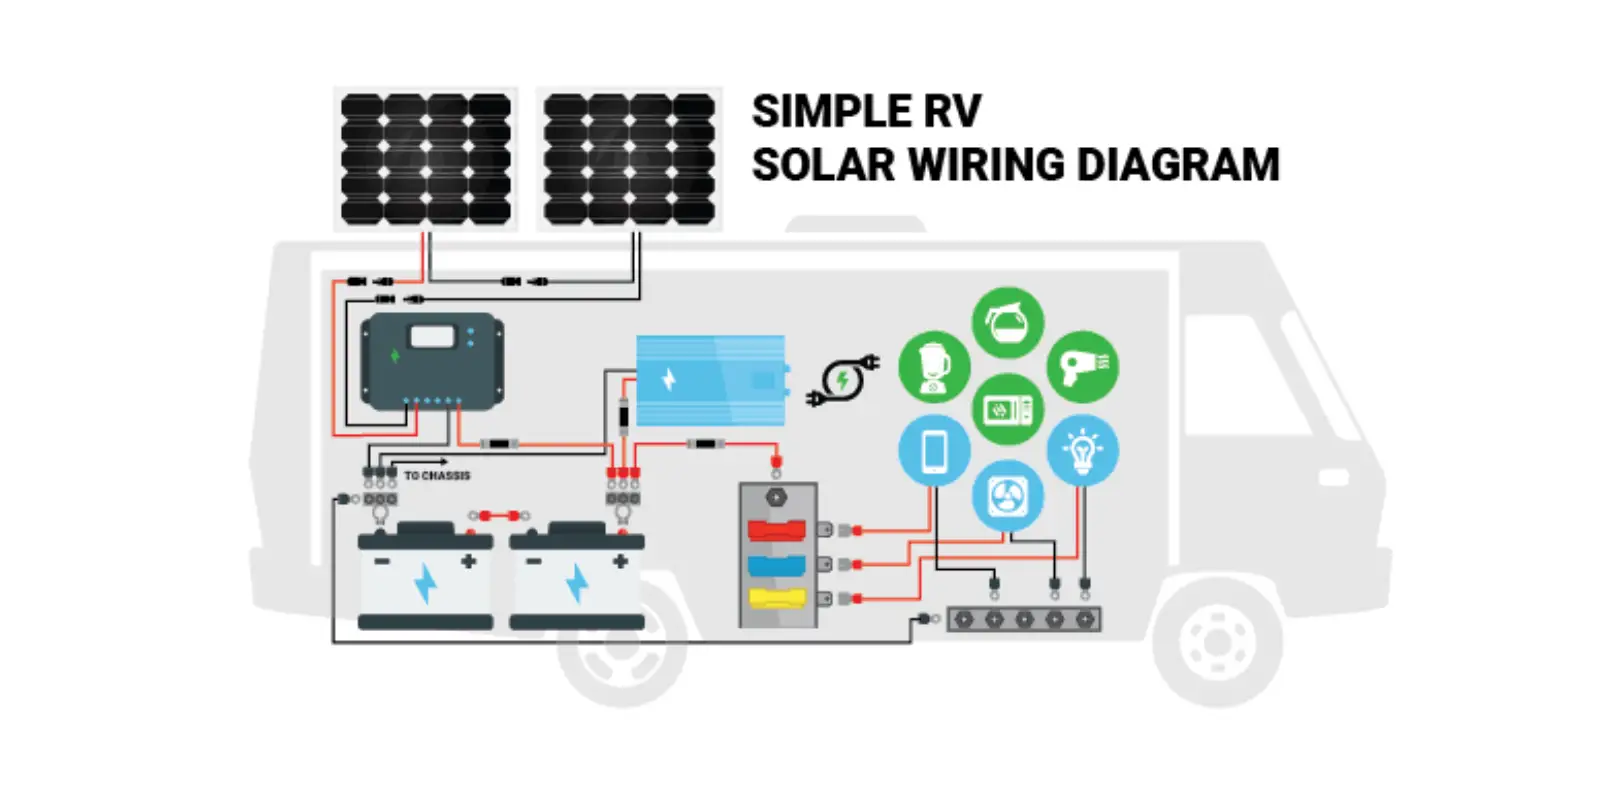
1. Sizing Your System: What Do You Actually Need?
Before you spend a single dime on gear, you need to map out your “power budget.” This stops you from overspending on a massive system you don’t need, or worse, undersizing it and running out of juice.
Step 1: Calculate Your Daily Energy Consumption (Watt-Hours / Wh)
Grab a pen and paper and list the essentials you’ll be running when you’re off-grid. The formula is incredibly simple: Power (Watts) × Hours of Use Per Day = Daily Energy Consumption (Watt-Hours or Wh).
Based on real-world RV usage data, here is what typical motorhome appliances draw on an average day:
-
- 12V Compressor Fridge: Draws about 40W on average. Running 24/7 (factoring in a 40% compressor duty cycle), it eats around 400Wh a day.
- LED Interior Lights (4-6 fixtures): Totaling around 20W, running for 4 hours a day = 80Wh.
- Roof Vent Fan: Draws 30W, running for about 5 hours = 150Wh.
- Phone & Laptop Charging
: Roughly 120Wh combined.
Total basic off-grid consumption: 400 + 80 + 150 + 120 = 750Wh per day.
Note: If you plan on running a microwave, a blender, or an A/C unit, your power needs will skyrocket. You’ll want to look at a system well north of 2,000Wh.
Note: If you plan on running a microwave, a blender, or an A/C unit, your power needs will skyrocket. You’ll want to look at a system well north of 2,000Wh.
Step 2: Match Your Panels and Batteries to Your Numbers
To keep your system running smoothly through rainy days and long nights, use these standard industry benchmarks:
-
- Solar Panels: Sunshine isn’t always perfect. Renewable energy data shows that we should usually budget for about 4 to 5 hours of “peak sun hours” per day. If you need 750Wh of juice, your panel wattage should look like this: \(750\text{Wh} \div 4.5\text{hours} \approx 166\text{W}\). Factoring in line loss and less-than-perfect weather, a 200W to 300W solar array is the sweet spot for a solid, baseline setup.
- Battery Capacity: You need enough storage to back you up for 1 to 2 days. If you go with premium 12V Lithium Iron Phosphate (LiFePO4) batteries, they support a 100% Depth of Discharge (DoD) without taking damage. This means a single 12V 100Ah battery (which stores 1,200Wh) will comfortably cover your daily power use and give you a great safety net.
Step 3: Picking Your Panels
-
- Monocrystalline vs. Polycrystalline: Go with Monocrystalline, hands down. Recent data shows commercial mono panels hit efficiency ratings of 18% to 22%, while poly panels lag behind at 15% to 17%. Space on a motorhome roof is premium real estate. That extra 4% efficiency means you get way more power out of a much smaller footprint.
- Rigid vs. Flexible: Rigid, aluminum-framed panels last longer and handle heat much better—perfect for flat, solid roof spaces. Flexible panels are lightweight and bend, making them great for curved or weight-sensitive roofs.
2. Tools and Materials: Your Pre-Game Checklist
Gathering all your tools before you climb up top will cut your install time in half.
-
- Core Components: Monocrystalline solar panels (e.g., 200W total), an MPPT charge controller (choose MPPT over older PWM models—it squeezes 20% to 30% more efficiency out of your panels), a pure sine wave inverter (to convert DC power to standard AC wall power), and your 12V lithium battery.
- Mounting Hardware: Aluminum Z-brackets with screws, or no-drill ABS plastic mounting brackets, plus an RV-specific cable entry gland (waterproof junction box).
- Wiring & Safety Gear: 10 AWG UV-resistant solar cabling, MC4 connectors, and properly rated fuses/circuit breakers to keep your rig safe from short circuits.
- Handy Tools: A drill, heat shrink tubing, wire strippers, an MC4 crimping tool, and a tube of high-quality marine-grade waterproof sealant (like Dicor self-leveling lap sealant or Sikaflex).
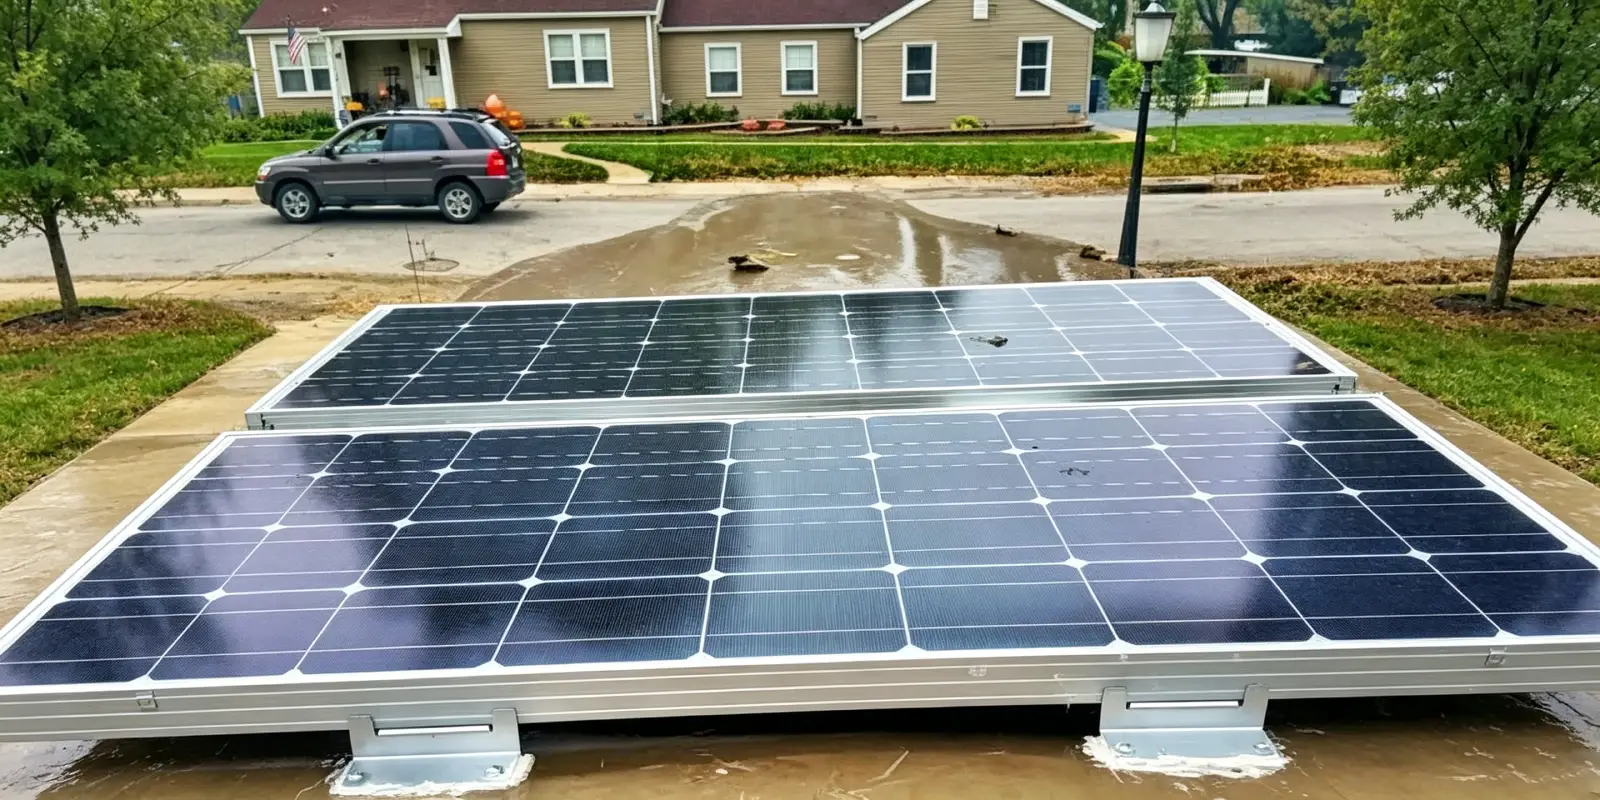
3. Step-by-Step Installation: Getting It Done
Follow these steps down to the T. Pay extra attention to the wiring sequence—it is the number one thing that keeps your expensive components from frying.
Step 1: Roof Layout and Dry Run
Don’t jump the gun with glue or screws. Carry your panels onto the roof and do a “dry run” first.
-
- Keep them away from the shadows of your A/C unit, roof vents, or TV antennas. Because of how solar panels are wired internally, even a tiny bit of shade on one corner can cause the output of the whole panel to completely crater.
- Leave enough gaps between the panels so you can easily clean and maintain them down the road.
Step 2: Securing the Panels (Drilling vs. No-Drill)
-
- The Drilling Route: Bolt the Z-brackets onto the frame of your solar panels. Put down a thick dollop of self-leveling lap sealant over the spots on the roof where the brackets will sit. Drive your self-tapping screws through the brackets and into the roof structure. Finally, smother the screw heads and bracket edges with another heavy layer of sealant. Trust me, an extra dollar spent on sealant now saves you a massive headache on a rainy day.
- The No-Drill Route: If you have a fiberglass roof, use ABS brackets. Clean the roof and the bottom of the brackets thoroughly with isopropyl alcohol. Apply a high-strength structural adhesive (like Sikaflex 252), press them firmly onto the roof, and let it cure for at least 24 hours. This method gives you zero risk of roof leaks.
Step 3: Running Cables and Weatherproofing
Now you need to get those wires inside the rig.
-
- Drill a hole through the roof that’s just big enough for your two solar cables.
- Pop the cable entry gland right over the hole and feed the wires through.
- Put a heavy bead of sealant under the entry gland, screw or glue it down, and crank tight the waterproof nuts around the cables.
Step 4: [Crucial] Connecting the Controller to the Battery First!
Read this three times: Always connect your charge controller to the battery BEFORE you plug in the solar panels.
If you hook up the panels first, raw high-voltage power will rush into the controller with nowhere to dump it, which can fry the brains of your controller instantly.
If you hook up the panels first, raw high-voltage power will rush into the controller with nowhere to dump it, which can fry the brains of your controller instantly.
-
- Use the right gauge wire (usually 10 AWG or thicker) to connect the
BATTERYterminals on your controller to the positive and negative posts on your battery. - Install an inline fuse (usually 30A-40A depending on your manual) on the positive cable, keeping it as close to the battery as possible.
- Use the right gauge wire (usually 10 AWG or thicker) to connect the
Step 5: Plugging the Solar Panels into the Controller
-
- If you’re running multiple panels, use MC4 branch connectors to wire them in parallel (keeps it 12V but bumps up the amps) or series (combines the voltage, which MPPT controllers love).
- Take the wires coming down from the roof and hook them into the
SOLAR / PVterminals on the controller. The second you make that connection, the screen should light up or your bluetooth app will show “Charging.” Congratulations—your rig is officially drinking up the sun!
4. Common Pitfalls to Avoid (Pro Tips)
Here are the biggest blunders DIYers make when tackling their first solar install:
-
- Using thin wires to save a buck: Solar systems operate on low voltage but high current. If your wires are too thin, you’ll suffer a massive voltage drop. All that lost power turns into heat, which can melt wire insulation and cause fires. Stick to dedicated 10 AWG solar wire.
- Working on live wires: When your panels are exposed to the sun, they are actively generating juice. If you click MC4 connectors together in mid-air, they can spark. Cover the panels with a piece of cardboard while you work, or wear insulated gloves to play it safe.
5. Keeping Your System Happy
Solar setups are pretty much “set it and forget it,” but a little love goes a long way:
-
- Give them a quick bath: Roofs collect dust, tree sap, and bird droppings. Data shows that a thin layer of grime can slash your solar efficiency by 10% to 15%. Every few months, give them a wipe down with fresh water and a soft sponge.
- Check the seal: Once or twice a year, give the brackets a gentle tug to make sure everything is solid. Check the lap sealant for any tiny cracks or weathering, and touch it up if needed.
Installing solar on your motorhome isn’t rocket science. Once you map out your power budget and follow the golden rule of battery first, panels second, you’ll save thousands of dollars in shop labor fees. Best of all, you get the absolute freedom to park wherever you want without ever worrying about running out of power. Stay safe, take your time, and we’ll see you out on the highway!
Related Posts
The Ultimate Guide to Choosing a Flexible Solar Panel Supplier in China (2026 Sourcing Guide)
Finding a trustworthy Flexible Solar Panel Supplier in China is critical for B2B buyers looking…
Private Label Portable Solar Panels: The Reseller's Guide to Escaping Price Wars
Private label portable solar panels are the only way to escape the price war. The Hard Truth…
From Construction to Appliance — How to Reduce Return Rates for Balcony Solar Kits
Balcony solar kit return rate is the hidden profit killer most wholesalers don’t track…


Leave a Reply